Tuesday, April 29, 2014

Spring Furniture Redos!

I've got this little idea in my head that maybe the reason I don't blog as much as I should is because when I do, I over-do. I know I tend to be the person who overcomplicates things in general anyway, so maybe I've carried that over to blog-land. So I'm gonna try and keep this one nice and simple! Short and sweet! Less is more!

I wanted to share a couple pretty cute furniture redo's I finished a while back, when we had a short break between snowstorms and April showers. It was so nice to be outside! I even got to don a tshirt for a little bit. We had a few days where we got into the high 60's, but I don't think we ever reached the ideal 'sunny and 75!' Now we're stuck inside again. High's barely above freezing, and rain mixed with snow. For like 3 days!! Ughhhh. Talk about California dreamin'......

Anyway! I'm doing it again, aren't I? too much talky talk. Down to business!

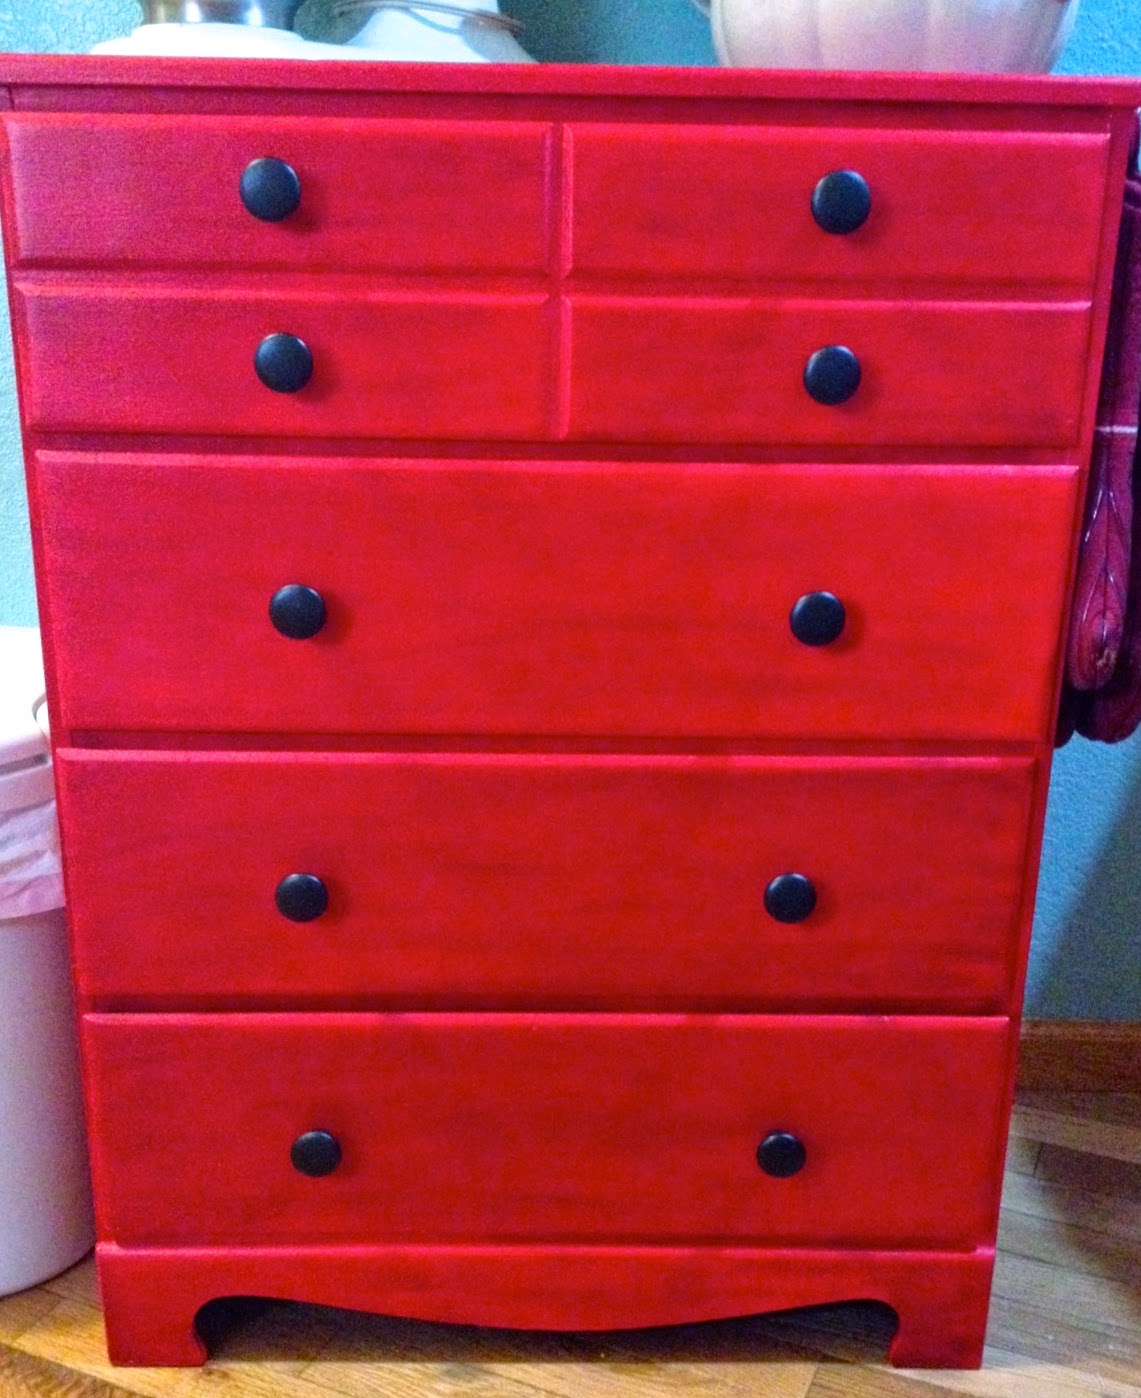
Here's my first victim.... Mwahahaha
 

Previously it was in my bedroom housing a fair amount of clothing.. But when we moved to our current apartment, there was a ton of storage room in our bathroom and when all those clothes got relocated, this little dresser came to live in the kitchen! It's great for holding all that mismatched tupperware, saved spaghetti jars that I just know have a new life coming, and a bunch of other stuff. It's actually my spice cabinet right now too!

I really wanted to use chalk paint, but 1) I was too inpatient to order online, and 2) I probably wouldn't have spent the money on it right now anyway. But I had read about making your own using Plaster Of Paris, which I just happened to have an old box of! Yay!


Mixed it up, 3 tablespoons to 1 cup of paint, barely sanded my piece, wiped it down for dust, and slapped this on! It dried super fast. I did two coats in less than an hour I think. I did sand just a little bit between coats, but I probably didn't really need to. I let it dry a good 18 hours or so, then decided it was too shiny and orange-y, so I kinda...colorwashed it, I think. I just mixed a drop of black acrylic craft paint with some water and wiped it on with a rag. I kinda just made it up as I went along. I added a couple coats of wax, and ta-da! I think it turned out pretty nice! 


I didn't even add new knobs - those are the same ones it had, I just gave them a quick painting with some 'oil rubbed bronze' spray paint and voila! This adds so much storage to my kitchen. I love it!


On to victim number two...
 

Just a homely little bookshelf that I picked up off the curb when our neighbors moved out last summer. It's made a great entry-way storage solution, storing bags, purses, shoes, tools, and, I've made great space saving use of the top as my ironing board lately!

I used the same paint, except I added a few drops of my black paint before I used it this time - it made the perfect color when finished - without all the extra work (and slight streakiness) of the whole color wash ordeal! (Not that I'm complaining, it was pretty fun :) I did three coats, some light sanding, and a couple layers of wax, and ta-da again!
 

Not the best pictures, but you get the idea. It's pretty, functional, and really durable! I've slid some heavy wooden boxes around on the bottom shelf, and it hasn't scratched or rubbed the paint off at all! Woot woot! :)

Thanks for checking it out!

Finally Back!

Hello again!

I must apologize for my absence for the past few weeks! I'm so sorry. I have many 'reasons' but I'm sure if I started listing them they would sound much more like 'excuses,' so, what it really boils down to is being unmotivated laziness. Sure, I've been busy doing other things, but if I weren't so lazy after those things, we would have had blog posts every day!

So what have I been up to? Well I've been sewing a little, painting some furniture, sorting through my closet in an attempt to simplify my wardrobe, working of course, and, drumroll please.... I finally worked out a bill payment/income/savings system that WORKS! I love it!!

I've tried other people's methods and systems and printables before, but nothing ever seemed to work just right for us. So far the best system I had going was tacking the paper bills to a bulletin board in the order they were due. Which was logical... except for all the bills that we don't get paper statement for! We had a couple set up to auto-pay, and the rest we just tried our best to remember. Not exactly  fail proof. So when I came across a link to this printable on Thirty Handmade Days, I was excited. 'Maybe this is the one' I thought to myself, Ted Mosby style. (Side note, I've been on a HIMYM binge lately too) So I printed 'er out and started penciling it in. Only to find, sadly, that it was not perfect for me :( wah wah wah. While it is awesome for a TON of people, it just didn't work quite right for our needs. I loved the idea that it was on on one page in a simple, easy summary, but I realized I needed just a little more detail on mine. I also love the spending records in the packet, but wanted to see if I could incorporate them both into a one-sheet deal. I couldn't. But I do love what I came up with... after several trial and errors - Check it out!   

Easy Two Page Month at a Glance Budget


And speaking of trial and error - I hope this works for you to download! This is my first time sharing a document on blogger (or any online platform, lets be honest!) so I hope I've done it right. You'd think an hour of googling would pay off... Ha ha

Why is this the perfect system for us?
First off, I wanted to keep better track of exactly how much we're making. With my house cleaning work, there are many variables, so even when I estimate what I should have coming in, sometimes someone is sick, or on vacation, or has extra cleaning or organizing to be done, so my income changes up or down accordingly. I wanted to be able to see exactly where we had extra income, and exactly where that money was being spent. So at the beginning of the month, I look at my work schedule and fill in the Expected Income box. Then I record every check I deposit, as well as any (however small) etsy sales (cause that's not takin' off yet!) on the Income Ledger portion below, and keep a running total on the far right. That way, at the end of the month, it's super simple to copy all income into the Actual Income box back at the top.

As for the bills section, I listed them in order that they are generally due, but because the due date and amount changes on some, I left those columns blank so I can write in the specific date and amount when I get the statement, either in the mail or online. I also left enough room in the Paid column to record payment confirmation numbers if needed.

I didn't include credit cards in the regular bill lineup, mainly because I had a different format in mind. I wanted to clearly see our progress in paying them off, so I needed room for starting balance, recording payments, and more than one a month, if possible (I try to send some of that extra income here) and of course the ending balance. I did include a section for new charges, although with the goal of paying all our debt off, it's not a category I plan on using unless there is an emergency. (and no, ice cream and beer do not count as emergency purchases! Ha ha)

As for the Spending Ledger.....I have to admit, it's a category I've got mixed feelings about. I did want to try the cash envelope system, but my husband wasn't as enthusiastic as I was, so I came up with this. And I have to say, the thought of saving all receipts and copying them down when I get home does discourage impulse buying!! And we can see exactly what we're wasting money on, assess what we need to change, and do it!

So that's why I love my new system! Hopefully it works for you too, or at the very least inspires you to find what does. Thanks for stopping by!